Set Up WordPress Blog:
Set up a WordPress website/blog:
You will be setting up a free wordpress.com website/blog to create and publish some of your assignments this semester. If you already have a wordpress.com website or blog for another purpose, you can skip this section and start at the setup section. Reach out to your instructor if you have any questions.
1. Set up a FREE wordpress.com website/blog. Start by visiting https://wordpress.com/free/ and clicking “Get Started” or “Start for Free.”
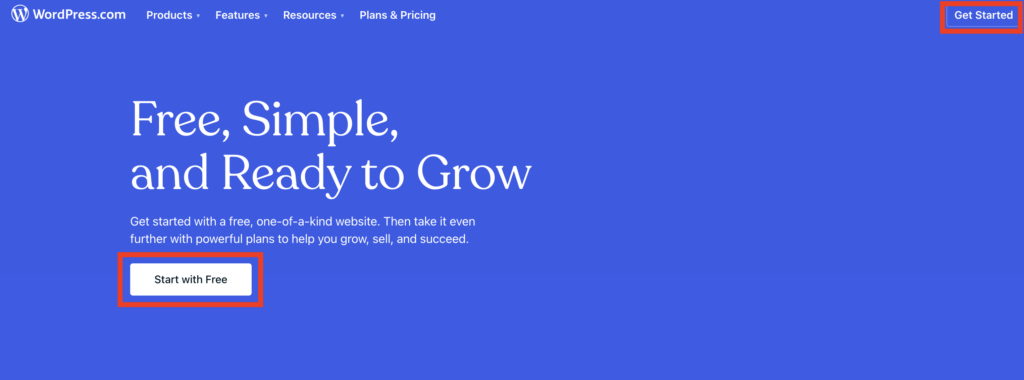
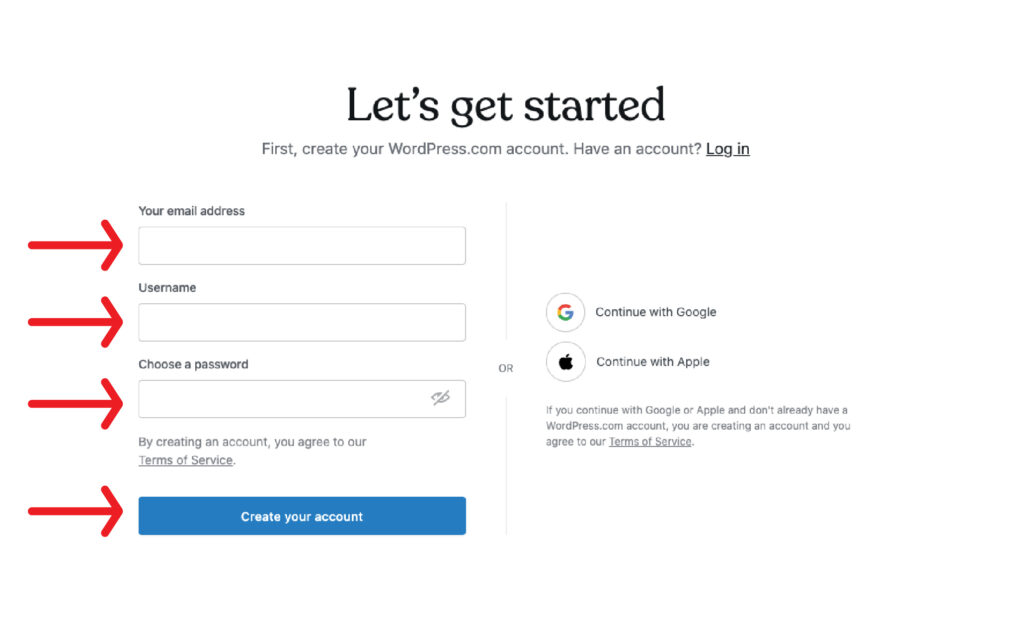
2. Create a login. After you click on the “Get Started” button, it will take you to a new page and ask for your email address. You may use your BYU-I email address or your personal email address if you would like. You will also need to create a username and password.
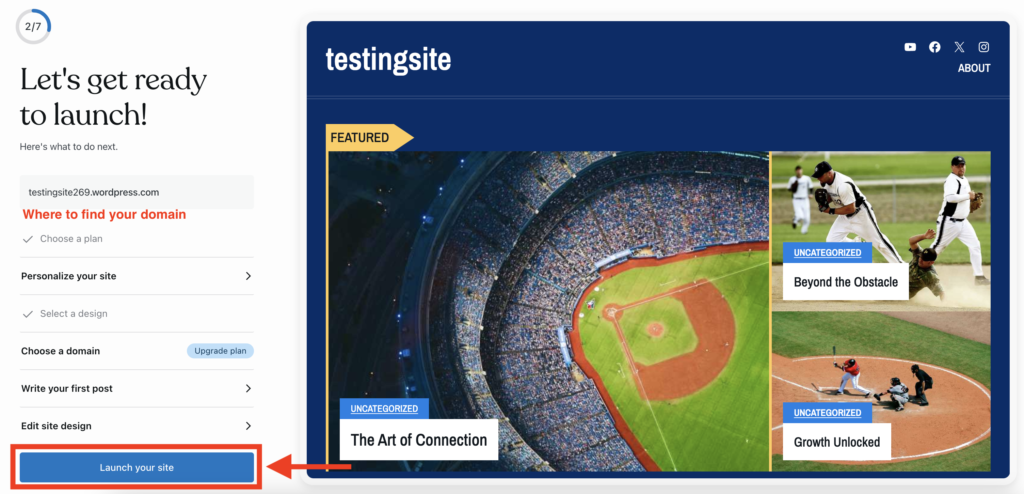
3. Launch your site. The next page will ask you to choose a website name and description. After you click “Continue,” you will be able to choose a theme you’d like, essentially choosing the look of your website. Finally, it’s time to launch your site. Notice, you’ll see the domain provided to you by WordPress based on the website title you chose earlier. Click “Launch Your Site.”
Note: Your preview on the right side of this screen will look different based on the theme you chose for your website.
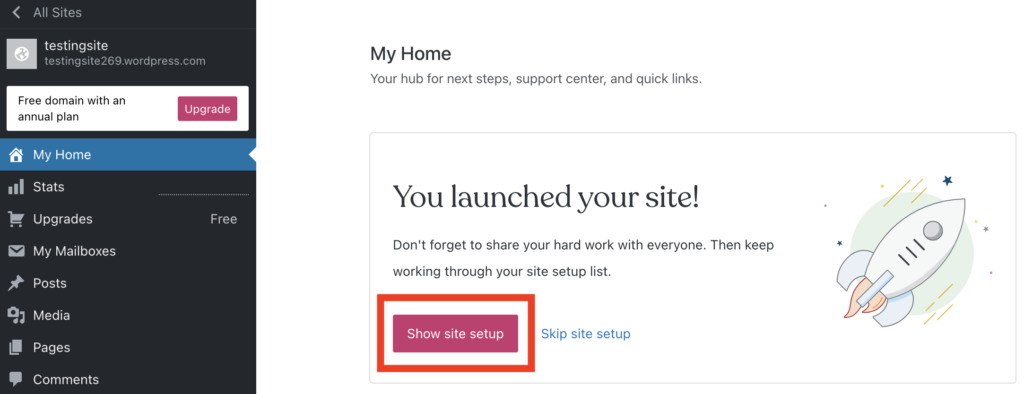
4. Customize your site. After your website is created, you will see your WordPress home screen. There, click the button that says “Show Site Setup.” Then, you can work through the steps if you would like to customize your website further. Don’t feel pressured to make this anything fancy, but feel free to play around with some of the options.
Organize your blog:
If you are using the same blog for other classes, you should set up a category to separate and organize your content like a website. (Notice the tabs across the top of this sample blog.)
1. Go to the Categories page. On the left-hand side of your dashboard, hover over the link that says “Posts”. Click on the link that says “Categories” from the pop-up menu that appears.
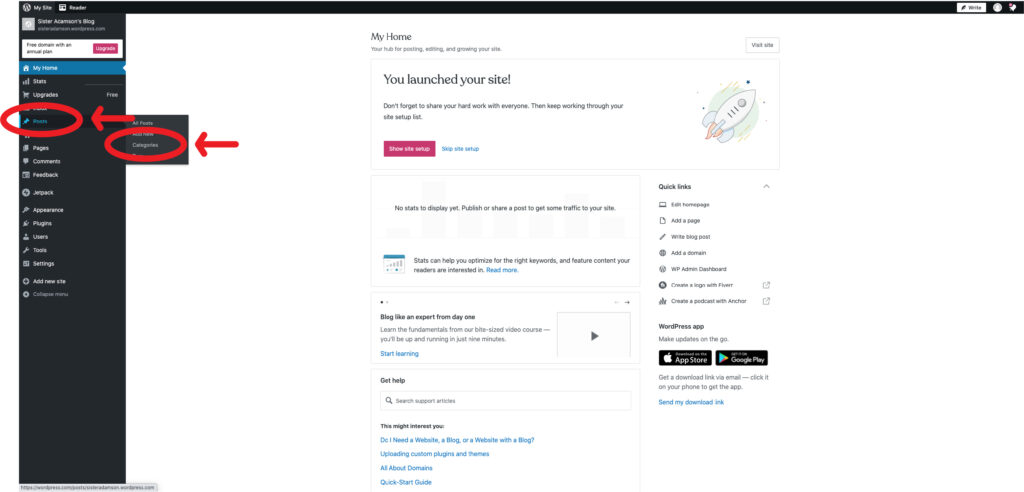
2. Add a new category. Click on the pink button on the right-hand side that says “Add New Category”.

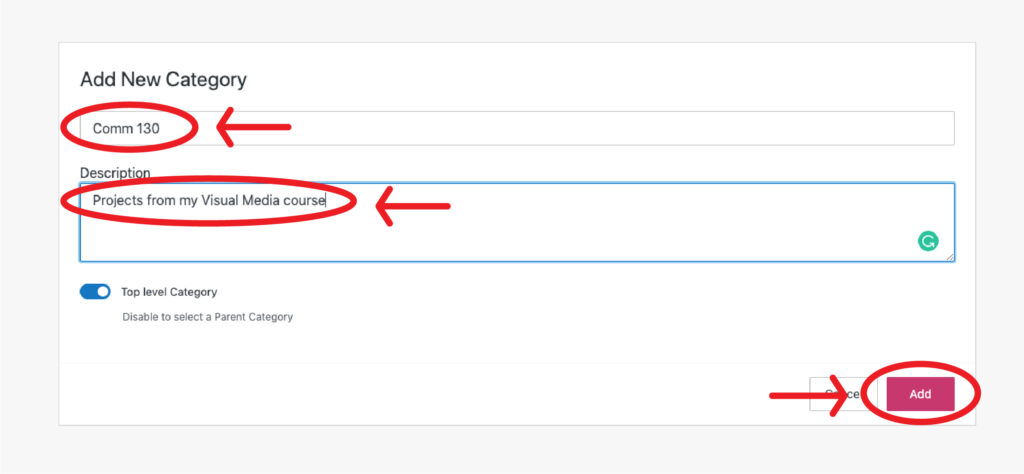
3. Name your category. Choose a name for your category. This can be anything you want it to be but make sure that it is easily identifiable and relates to the content that will be posted in this category. The name of the category will appear in your menu, so make sure that the name you choose is what you want to appear on your site.
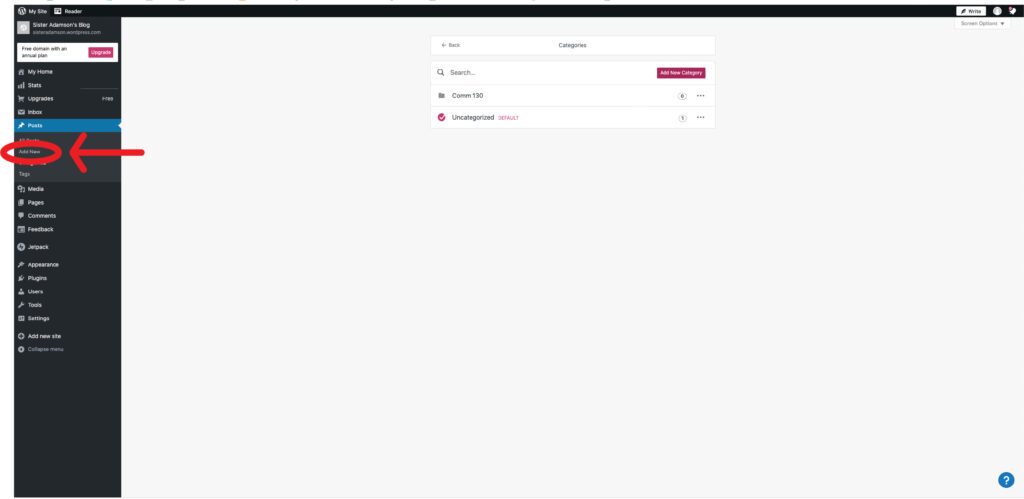
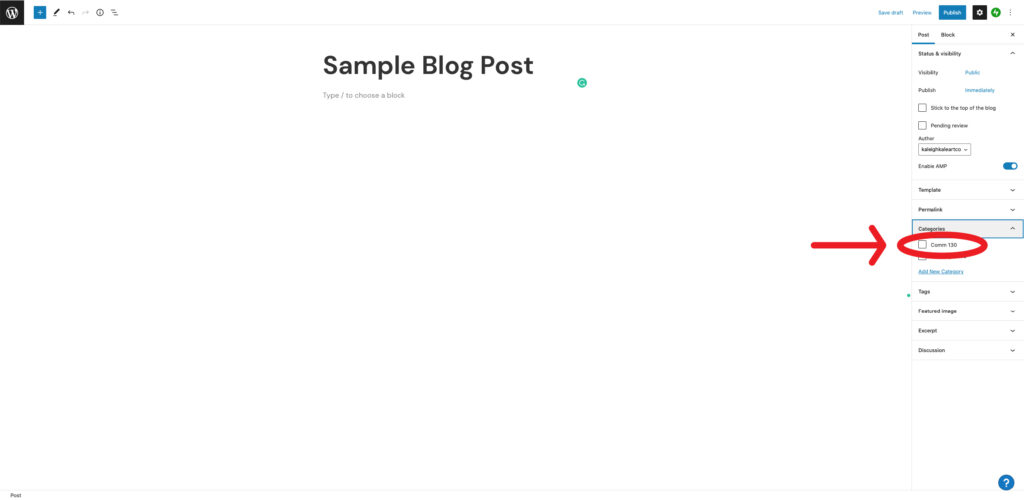
4. Categorize your posts. From now on, when you create a blog post, you will want to make sure that this new category that you’ve created is selected. To do so, click on the “Add new” link underneath Posts on the left-hand side of your screen. Once you are on the page to write a new post, look on the right-hand side. Under the menu item labeled “Categories” on the right-hand side, you will see the categories that you’ve created. Make sure the correct one is selected when writing blog posts for this class.
Submission:
Currently, you are just being asked to set up this blog for future use in this course. No submission of your link is necessary at this step. However, keep in mind that you have a Reverse Engineer Post assignment due at the end of this week, so the sooner you get your blog setup, the more prepared you will be for that assignment.
